| |
|
|
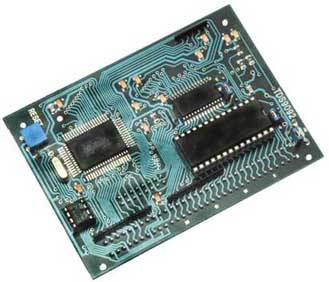
INTRODUCTION TO TDS9092ABOUT THIS MANUALThis manual helps you use the TDS9092 Forth computer, a small (100 x 72mm) board for dedicated applications. You write your applications software and put it into a PROM. The board is embedded in the equipment you are making and when power is applied your software starts to run. The manual does not cover the Forth language. If Forth is new to you it would help to get 'Forth Programmer's Handbook', the manual carries on where the book leaves off, but note that the Fig-Forth of TDS9092 has some small differences from ANS Forth. We include a list of Forth words used and most of the manual is concerned with aspects particular to this computer such as interrupts, assembler routines, and multitasking. Creating a stand-alone system and off-card hardware and software extensions are covered. There are many examples such as use of Liquid Crystal Displays, keypads and PCMCIA data logging. In the manual Forth words are printed LIKE THIS and PC commands and responses are shown LIKE THIS. Many Forth words are included twice, the WORD LIST has a full description and sections such as LIQUID CRYSTAL DISPLAYS group words with related application. In Forth word definitions the parentheses show the stack conditions before and after the word. When there are more than two parameters the one on the right is on the top of the stack and is the most accessible. E.g. ( a1 n a2 - f ). Immediately following is a FAST START GUIDE. However we ask you to read all of the rest of this introduction before commencing work with the TDS9092. The rest of the book can then be used for reference when needed. Included in this manual and in the software library are application examples which we believe work correctly. We can take no responsibility for any faults in this or other information, which is offered in good faith to users of the TDS9092. Under all circumstances liability is limited to the cost of your purchase from us. If you are unable to accept this condition (for whatever reason) please return the goods for full credit or refund. In the HARDWARE EXPANSION section you will find data on other boards and software compatible with the TDS9092. All items are usually from stock but please call or fax for current price and delivery.
FAST START GUIDEHARDWARETo make the TDS9092 work you must have four shorting links in place as follows:
q Link F at the end of the RAM/PROM socket on top of the board. This selects an application RAM instead of a PROM. For further details see the table in the STAND-ALONE SYSTEMS section q Link V between pins GND and SHDN underneath the board. This enables the voltage regulator and allows power to the board q Link W by the surface mount RAM on top of the board. This feeds the write signal to the application RAM q Link Y by pins a1 and c1 on top of the board. This selects a 32K x 8 application RAM instead of an 8K x 8 device
The TDS9092 must be connected to a power supply and to an IBM PC compatible (or dumb terminal). You must also plug a 62256 32K RAM in the dual-in-line socket. The RAM goes in the socket with its notch towards the edge of the board. The power supply connections are as follows. No negative supply for the RS232 serial link is needed, it is generated on the board. In particular make sure you use pin a32 for power and c32 for ground, not the other end of the connector. The pin numbers are clearly marked.
As an alternative to a DC supply, the TDS9092 has space for an on-board smoothing capacitor so that it can operate straight from a mains transformer. Fit a 470µF/16V capacitor as in the diagram on page 6, with the positive terminal closer to the two rows of pins (the holes for the capacitor leads are a little larger than the others and have solder pads underneath). Power can now be supplied from the secondary of a 6V transformer connected across a32 and c32. The PC is connected via a serial port-any hardware RS232 serial port connector can be used-but note that the software (by default) will choose the lowest available COM port. For instance COM2 if a mouse occupies COM1. The serial connections are:
Connections for a dumb terminal are as for a 25-pin PC connector. This can be useful once the program is finished and in PROM. You could access the system in the field with a hand terminal for example. Some dumb terminals need connections between other pins at the 25-pin connector to enable operation, consult the terminal manual. It should be set in full-duplex mode, with 8 data bits, 1 stop bit and no parity. Select a baud rate of 9600 on the terminal. On some non-PC compatibles it may be necessary to reverse pins 2 and 3, or to use a 'null modem' connecting link. When using a different computer for input/output to the TDS9092 you must provide software in it to transfer each key-stroke to the serial port, and to put each incoming character on the screen. ABOUT THE CDAll files have been checked with an updated version of Norton AntiVirus. On the CD are:
q A copy of the Web site www.TriangleDigital.com, plus other material such as circuit diagrams. To access it, click cdindex.htm in the root directory of the CD. No installation is involved, nothing will be written to your hard disk. The site will be viewed using your installed browser. q TDS-PC for Windows, the PC development environment for TDS2020F and TDS9092 card computers. To install, click setup.exe in the root directory of the CD. As well as the user interface of editor screens and interactive window, current library files for both computers will be placed on your hard disk. q Items useful to developers, including the draft ANS Forth standard. They are in the directory \essentials. INSTALLATION OF TDS-PC FOR WINDOWS
q Close all running Windows applications. q Place the CD in its drive and run setup.exe in the CD's root directory. q A small setup window will transfer system files to update your computer if necessary. q A dialog box suggesting c:\tdswin\ as the default TDS-PC for Windows directory appears-alter if you want the software placed elsewhere. q Click the big button to start installation. q Files are now transferred and a new program group created. q A desktop icon is not automatically made; you can make a shortcut there, pointing it at file c:\tdswin\tds305.exe (or later version as appropriate).
All users should look at file _updates.tds. This contains information on updates to the Forth kernel. It is also important to see file readme.hlp for the latest information and corrections to the Technical Manual. If you need the PC support software on more than one machine, do not set up on one and then copy the files to the other. Install twice from the CD so that the tds-pc.ini configuration file automatically created on first use (in your \windows or \winnt subdirectory) will be appropriate for each computer. START-UPFor full details of use and customisation see DEVELOPMENT SOFTWARE but if you are in a hurry start TDS-PC for Windows from the 'Start' button menu. You are presented with the Computer board selection window and should ensure that 'TDS9092' is selected. If the set up is successful, there'll be a short delay while the PC checks for the presence of a TDS9092. Date and time are also set from the PC clock. The Interactive window at the bottom will clear and the TDS9092's start-up message will appear at the top of the window. Communication with the Forth computer is now established. You can type Forth words and after pressing return, they will be interactively executed. RESOLVING PROBLEMSIf the PC does not have a CD drive, you can make a set of 1.44MB floppy disks from the CD in another machine. Open the directory \tds-pc and run makedisk.bat. If setup.exe in the root directory of the CD does not work on your PC, try setup.bat in the root directory and then the setup.exe in the \tds-pc\disk1 subdirectory. If you don't see the banner coming from the TDS9092, select the Interactive window with the mouse (caption band at the top goes darker than other windows) and then press return a few times. If you see the 'ok' prompt, type COLD and return to reinitialise the remote computer. If the TDS9092 does not reply, and you see the 'not responding' message:
q You may not have switched on the TDS9092. q Its power supply may be bad, check that the voltage used is +6 to +16V. Do not use a small battery. q You may have a faulty cable or wrongly wired connectors. q You may be connected to the wrong COM port on the PC. To change it see COM PORT.
Correct the fault and first disconnect the TDS9092 from both the power supply and PC so that you can try a proper cold start again. Select the black Interactive Window then 'Options', then 'TDS Computer' to bring you back to where you were. Select OK to try to again to connect to the remote computer. If you get the message 'Serial Error', see SERIAL ERROR. Some notebooks have problems with communications programs like TDS-PC for Windows-they may turn off the serial port when not receiving or transmitting. If you get this problem, look into the hardware configuration options for the machine. Also, try pressing the reset button on the TDS9092. Another possibility is that the computer is in its standby mode, by software or because the STBY* pin is held low for some reason. If still unsuccessful there may be a hardware problem. Before requesting assistance please look at the readme.hlp file because it may have instructions which are more up to date. Also read the updates to the Forth system in _updates.tds. When you contact us, please be sure to state:
q Which computer (TDS2020F or TDS9092) and connected accessories you are using q Version number on the Forth ROM q Version number of the development software on your PC (click 'About').
To get personal help see CONTACTS. If you leave a message by email or telephone, we'll usually get back to you within 24 hours, often much faster. News and updates, including the latest files for downloading, can be found on Web site www.TriangleDigital.com. TDS-PC FOR WINDOWS ON A MACWe have no direct experience ourselves, but here is information from a user:
"I'm running Windows XP Pro using "Virtual PC v.7.0" (VPC), which is much faster and more stable than previous versions, on a Mac Mini working with Mac OSX "Tiger" (v.10.4). "Mac's don't have serial ports, so I've bought a cheap USB-Serial Converter, ATEN International Model no. UC-232A (available from Matt's Computer Solutions - www.mcsx.co.uk - for 12 quid ($22)!). The device is installed (under VPC) as COM3, but can also be installed under Mac OSX. "Mac OSX uses function keys as shortcuts, and F9 has to be disabled, so that it can be used in TDS-PC to open files. F1, F2, F3 and F8 are available anyway. With the previous Mac OS v.10.3 ("Panther"), the use of the F9 key shortcut was implemented, but not documented and not disable-able, so F9 couldn't be used within TDS-PC for Windows. "There is one slightly annoying feature using this Converter:- If TDS-PC for Windows is started without ensuring that the USB port is properly enabled under XP Pro Preferences, then line 3 of tds-pc.ini gets corrupted during start-up to read 'Communications port=COM16', causing an abort. It is then necessary to find tds-pc.ini and edit it back to ' ... COM3' . The simple solution seems to be to make file \windows\tds-pc.ini read-only. The same happens on my PC running Win98, so this is presumably a bug in the USB-Serial Converter software. But what do you expect for 12 quid ($22)?! "Apart from that, everything works perfectly and as quickly as on a PC. "By the way, the Mac Mini is a very nice piece of engineering. Only 16.5 x 16.5 x 5cm (6.5 x 6.5 x 2 inches), with 80 Gb hard disc, Super-drive DVD slot, Airport & Bluetooth. Mac OSX 10.4 is some way ahead of XP, too." (by Keith Maries) DOCUMENTATIONComplete TDS9092 Series documentation comprises:
q TDS9092TM TDS9092 Technical Manual. This book, 275 pages. See ABOUT THIS MANUAL. q STARTING FORTH By Leo Brodie. The best book for learning Forth, whether as a beginner or seasoned professional. Although it has a humorous twist there is great depth here. A mastery of its contents will improve not only your Forth applications software expertise, but also give an understanding of how the system works. If you have not used Forth before this book is essential. OVERVIEW OF THE METHOD OF DEVELOPMENTThe development of a PROM based application can often use equipment you already have. From experience we suggest you start by putting the hardware of a prototype together. When this is ready software development can start. HARDWARE OF THE PROTOTYPEFirst the TDS9092 Series computer is built into the prototype of the product, and is connected to whatever special input or output is required. The decoding on the board may be used to add multiple serial channels or more parallel access lines to LEDs or other peripherals. The system can easily be interfaced to LCDs, triacs, printers, keyboards, switches, displays or motors. This manual gives some circuit examples. Physically mount the TDS9092 in one of three ways:
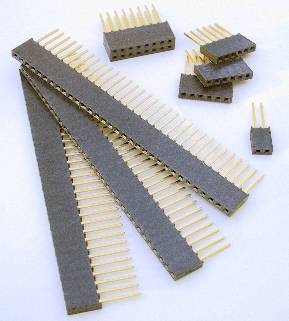
q TDS9092-PLUG version in a Eurocard rack. It is 100mm high, but only 72mm long. q TDS9092-PIN version in the bottom of a box. There are four mounting holes for screws. Connect to the board with ribbon cable. q TDS9092-PIN version as a plug-in 'component' computer on a larger mother board. This could be a Eurocard for example.
Often a product will consist of two boards; one being the TDS9092, the other carrying keyswitches, display, and whatever other special logic, input/output or memory is required by the application. Use the mounting holes to connect the two together as a sandwich. Into the prototype you also build an RS232 connector going to serial port 1 of the TDS9092 computer inside the equipment. The umbilical cord which connects the prototype with the host computer or terminal will be taken away once the software is developed and working (you can also use the serial link as part of the equipment you are building).
SOFTWARE DEVELOPMENTThe interactive mode is used during debugging. Just typing the Forth commands and then return causes the action to be done. For example:
HEX 17 CONSTANT DATA ( Address of Port 6 DATA C@ . ( Fetch and display a byte input from Port 6
New definitions which extend the dictionary can be added in this way too. The second line above could be converted to:
: GET DATA C@ . ;
This adds the new 'word' GET to the dictionary. The action now doesn't happen till you type GET followed by return. At this point the byte present on Port 6 will be read, converted to characters and sent to the serial link (your terminal during development). Direct access to your peripherals in this way will help debug your prototype hardware before you start writing the real program. The second mode is not interactive. From inside the TDS-PC program F9 accesses the word-processor you normally use. Code is laid out as you wish, preferably with lots of comments and indents to bring out the structured nature of Forth programming. The plain ASCII file produced is compiled on the TDS9092 by the single function key F8. If compilation stops on error, one key brings you back into the word-processor. See DEVELOPMENT SOFTWARE for full details. Built-in software also offers a full screen Forth editor with traditional 64 x 16 character 'screens'. Using the interactive mode, word-processor or full screen editor the on-board compiler reduces your source code input to executable Forth dictionary format. Since this is compiled code it runs an order of magnitude faster than the equivalent interpreted BASIC and so is more suitable for use in products. It also has enhanced interrupt and assembler capabilities. The built-in microprocessor assembler enables some of your program to be written in machine code for the ultimate in speed. Code definitions and high level Forth can be freely intermixed. The assembler also gives the possibility of using machine code interrupts if required. The dictionary builds up in a 32K byte RAM, the dual-in-line device which allows up to 29K of compiled code. Remember that there is also 16K of Forth and additional applications support code built into the computer. At the end of the development cycle the program consisting of compiled code is actually working in the prototype. It remains to make this code permanent. THE STAND-ALONE SYSTEMThe TDS9092 Series computer has to power up directly into the program which you have written. The dual-in-line RAM is made non-volatile by putting a DS1213C socket between the RAM and the IC socket. This device has a battery and protection against data corruption at power-up built into it. Add SET WORK at the end of the program and compile again (here we assume WORK to be the infinite loop into which you want the board to go on application of power). When compilation is complete switch off the TDS9092 at the DC side of the supply (to minimise spikes). To make the code permanent remove the DS1213C battery-backed socket with the RAM still in place and copy it in an PROM programmer. The PROM is now put in the socket on the board in place of the RAM. Next test that the system works from PROM and meets your own customer's needs. The procedure is fully detailed in STAND-ALONE SYSTEMS and you should be familiar with everything there when completing an application. You end up with a system which is not dependent on the computer or terminal used during development. It powers up directly into your application. |
 |